We know home theater - 26th Anniversary
Questions? CALL TOLL FREE 1-888-764-9273


HT Design Star Ceiling Layout Guide
A great star ceiling layout starts before any panel goes on the ceiling. You need to plan the room size, panel placement, power path, projector location, speakers, HVAC vents, lights, soffits, trim, and viewing area.
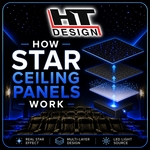
HT Design self-contained star ceiling panels make the installation easier because the fiber optic stars are already built into the acoustic panel. But the final result still depends on smart layout planning.
Quick answer: The best custom star ceiling layout is usually centered around the seating area, planned around projector and speaker locations, squared carefully from the first panel, and powered with an accessible driver and clean low-voltage cable path.
Before choosing panel sizes, decide what you want the star ceiling to do visually. Some rooms need a full ceiling effect. Others only need a feature area above the seating. In many home theaters, a focused star ceiling above the main seating area creates more impact than trying to cover every inch of ceiling.
Best for dedicated theaters where the ceiling is part of the full design. Requires more panels, more layout planning, and more power planning.
Best for rooms where you want the star effect centered above the theater seating or main viewing area.
Best for rooms with soffits, tray ceilings, lighting coves, or design elements where the star ceiling is a floating feature.
HT Design surface-mount panels come in standard sizes and can also be made in special shapes and sizes for custom applications. The right size depends on the room, the design goal, and how much ceiling area you want to cover.
| Panel Size | Best Layout Use | Design Notes |
|---|---|---|
| 24" x 24" | Small feature areas, modular layouts, tighter ceiling sections | Flexible for smaller rooms or layouts that need more adjustment around obstacles. |
| 30" x 30" | Balanced feature areas and medium ceiling sections | Good middle-size option when you want more coverage than a small tile but still need layout flexibility. |
| 48" x 48" | Large feature areas, main seating zones, square ceiling sections | Creates stronger visual impact with fewer seams than smaller panels. |
| Custom Shapes and Sizes | Tray ceilings, soffits, angled rooms, specialty theater designs | Useful when standard panels do not fit the design cleanly. |
The seating layout should guide the star ceiling layout. In a dedicated theater, the star ceiling usually looks best when it feels connected to the main viewing position.
Star ceiling panels should not be planned in isolation. The ceiling often has the most conflicts in the room: projector mounts, Atmos speakers, HVAC vents, recessed lights, wiring, and soffits.
Leave room for the projector mount, lens path, service access, power, HDMI, and ventilation. Do not block the projector with a panel edge or cloud feature.
Confirm Atmos or in-ceiling speaker locations before finalizing panel size. Avoid designs that require cutting into marked no-cut areas.
Do not cover supply vents, returns, or access points. Airflow should be planned before ceiling panels are ordered or mounted.
Account for recessed cans, soffit lighting, LED strip lighting, step lighting, and dimming controls before setting the panel layout.
Star panels can work well inside tray ceilings or framed feature areas, but the dimensions must be planned carefully.
Make sure power supplies, drivers, low-voltage wiring paths, and any control connections remain serviceable.
Power planning is one of the most important parts of a custom star ceiling layout. Do not wait until the panels are on the ceiling to think about the driver, leader cable, jumper cables, and switched power location.
HT Design panels use a driver power supply, a leader cable to the first panel, and jumper cables that daisy-chain power from panel to panel. The recommended method is usually to keep the driver accessible and plan a clean low-voltage cable path to the first panel.
Layout tip: Start power planning from the first panel, then work outward. The first panel location affects cable routing, panel sequence, and future service access.
The first panel is the reference point for the rest of the ceiling. If the first panel is slightly out of square, the error can become more visible as additional panels are installed.
Use pencil marks, masking tape, chalk lines, and careful measurements before mounting. This is not the place to rush. A few extra minutes planning the first panel can save a lot of frustration later.
| Layout Step | Why It Matters |
|---|---|
| Square the room | Rooms are not always perfectly square, even when they look square. |
| Mark the first panel location | The first panel controls the alignment of the full layout. |
| Use chalk lines or tape | Visual reference lines make it easier to keep panels straight. |
| Check the layout from the seating position | The ceiling should look centered and intentional from where people actually sit. |
| Confirm obstacles before anchors | It is easier to adjust the layout before mounting points are drilled or marked. |
A custom star ceiling does not always mean covering the entire ceiling. Sometimes the best design is a clean feature area that works with the room.
| Layout Idea | Best For | Planning Notes |
|---|---|---|
| Star Field Over Seating | Most dedicated theaters | Center the star field over the primary seating area for maximum impact. |
| Tray Ceiling Star Field | Rooms with framed ceiling details | Measure inside tray dimensions carefully and plan edge trim or reveal details. |
| Ceiling Cloud | Theaters with acoustic design features | Can create a floating effect and combine star lighting with acoustic treatment. |
| Front-to-Back Rectangle | Two-row theaters | Works well when the star effect should cover both seating rows. |
| Large Center Feature | Medium and large rooms | Creates a strong visual focus without needing to cover the full ceiling. |
| Custom Shape | Luxury theaters, angled rooms, specialty designs | Useful when standard panels do not fit the ceiling architecture cleanly. |
Traditional fiber optic kits give you full control over each star point, but that control comes with more labor. Self-contained panels are better when you want a clean, repeatable, finished ceiling system with less installation complexity.
| Layout Factor | Traditional Fiber Optic Kit | HT Design Self-Contained Panels |
|---|---|---|
| Star pattern | Fully custom star placement possible | Star field is built into the panel layout |
| Labor | Higher labor due to drilling and routing individual fibers | Lower labor because panels are already built with stars |
| Finished look | Depends heavily on installer skill | Finished acoustic panel appearance |
| Best use | Open ceilings and full custom builds | Finished theaters, drywall ceilings, and easier upgrades |
| Planning focus | Fiber routing and illuminator access | Panel layout, power path, and clean alignment |
The more information you provide, the easier it is to recommend the right panel layout. A quick sketch is often enough to get started.
A custom star ceiling layout should be planned around the room first and the panels second. Start with the seating area, screen wall, projector, speakers, HVAC, lighting, and power. Then choose the panel size and layout that fits the space.
HT Design self-contained star ceiling panels make the project easier because the stars are already built into the acoustic panels. The key is getting the layout right before installation starts.
Start by measuring the room, marking the seating area, locating the projector, speakers, HVAC vents, and lights, then choosing a panel layout that fits those conditions.
Not always. Many theaters look better with a focused star ceiling feature over the seating area instead of covering the entire ceiling.
Yes. Tray ceilings can be a strong location for a star ceiling feature, but the inside dimensions, trim, power, and panel size must be planned carefully.
The first panel controls the alignment of the rest of the ceiling. If it is not square, the mistake can become more noticeable as additional panels are installed.
Yes. Plan around Atmos speakers, in-ceiling speakers, brackets, and wiring before selecting final panel locations.
The driver or power supply should usually remain accessible. Plan the driver, leader cable, and jumper cable path before mounting the panels.
HT Design surface-mount panels are available in standard sizes and can also be made in special shapes and sizes for custom applications.
Call HTmarket.com at 1-888-764-9273 for help planning panel sizes, layout options, power paths, and custom star ceiling designs for your home theater.
Product availability, URLs, sizes, power requirements, installation requirements, prices, and specifications may change over time. Confirm current product details and local code requirements before ordering or installing.