We know home theater - 26th Anniversary
Questions? CALL TOLL FREE 1-888-764-9273


HT Design Star Ceiling Installation Guide
A traditional DIY fiber optic star ceiling kit can create a great look, but the install is usually where the project gets difficult. You have to lay out the star field, drill holes, feed fibers, glue or secure them, trim the ends, route everything to a light source, and plan access for future service.
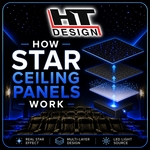
HT Design self-contained star ceiling panels are built to make that job easier. The fiber optic star effect is already built into the acoustic panel, the Star Engine is integrated into the panel system, and the panels are designed for surface-mount installation in home theater rooms.
Quick answer: If you want the easiest star ceiling installation for a finished home theater, choose HT Design self-contained surface-mount panels. If you want a completely custom star pattern and have open ceiling access, a traditional fiber optic kit can work, but it requires much more drilling, routing, trimming, and planning.
There are two very different ways to build a fiber optic star ceiling:
You receive fiber strands, an illuminator, and parts. You still have to build the star ceiling by drilling holes, routing each fiber, trimming the ends, and hiding the light source.
The star field is already built into the acoustic fiberglass panel. The panel installs as a finished ceiling product instead of a raw fiber routing project.
For most finished home theaters, self-contained panels are the practical choice because they reduce labor, mess, and installation risk.
| Installation Task | DIY Fiber Optic Kit | HT Design Self-Contained Panel |
|---|---|---|
| Star layout | Required: You lay out every star location manually. | Simpler: Star points are already built into the panel. |
| Drilling holes | Required: Drill many individual holes for the fiber strands. | Avoided: No need to drill every star point into the panel face. |
| Fiber routing | Required: Fibers must be routed back to the illuminator. | Built in: Fibers are contained inside the panel system. |
| Gluing and trimming | Required: Fibers usually need to be glued, trimmed, and finished. | Not needed: Star points are factory-built into the panel. |
| Light source | Separate illuminator box usually needs placement, cooling, access, and service planning. | Panel system uses low-voltage power and can daisy-chain from panel to panel. |
| Finished look | Depends heavily on installer skill and ceiling access. | Finished acoustic panel look with built-in star effect. |
| Best for | New builds, open ceilings, and custom installers. | Finished rooms, home theater upgrades, and faster installations. |
A traditional kit gives you raw components. The actual ceiling still has to be built. The exact process varies by kit, but most traditional fiber optic star ceiling installations follow this general path:
HT Design surface-mount panels are designed to reduce the project to a cleaner panel installation. The star ceiling effect is already built into the panel, so the installer is not drilling and terminating individual fibers.
The quick installation process is more direct:
With surface-mount panels, layout discipline matters. Do not eyeball the first panel. Square up the room and measure carefully before you mount it.
The first panel sets the alignment for the rest of the ceiling. If the first panel is slightly out of square, the error can grow across the room as more panels are installed.
HT Design surface-mount panels are built as acoustic fiberglass panels and are available in standard sizes. The larger the panel, the more important it is to plan mounting, handling, power, and alignment.
| Panel Size | Stars | Thickness | Power | Mounting Notes |
|---|---|---|---|---|
| 24" x 24" | 18 | 1" or 2" | 12v DC | Uses 4 surface anchors. |
| 30" x 30" | 30 | 1" or 2" | 12v DC | Uses 4 surface anchors. |
| 48" x 48" | 45 | 1" or 2" | 12v DC | Uses 6 surface anchors. Larger panels are easier with extra hands. |
| 48" x 96" | 90 | 1" or 2" | 12v DC | Uses 10 surface anchors. Use at least three people for handling large panels. |
The install instructions note that the panels have an 8" no-cut zone clearly marked on the back. Do not cut into marked no-cut areas.
The HT Design system starts with a driver power supply connected to a switched or controlled line-voltage circuit. A leader cable carries low-voltage power to the first panel, and jumper cables daisy-chain power from panel to panel.
The recommended method is to locate the remote driver in an accessible equipment area within 30 feet of the first HT Design leader cable. Larger installations can use additional drivers and leader cables.
Important: Electrical work should follow local code requirements. Disconnect power before electrical work, do not exceed circuit capacity, and use a qualified electrician where required.
For drywall installations, the install instructions are specific: EZ anchors are for drywall installation only and are not intended for other ceiling materials. They are intended for 5/8" drywall with wood framing.
If your ceiling is not 5/8" drywall with wood framing, the installer must source and provide an alternate means of attaching the mounting anchors.
HT Design surface-mount panels are not just decorative star lights. They are acoustic fiberglass panels with the star ceiling effect built in.
The product specifications list premium 6 lb. density acoustic fiberglass and a noise reduction coefficient greater than 1.0 NRC. That makes the panels a better fit for theater rooms than thin decorative panels or temporary star projectors.
Be precise with customer language: these are acoustic panels, not a complete soundproofing system. Real soundproofing depends on the whole ceiling/floor assembly, sealing, mass, isolation, and construction details.
| Situation | Best Choice | Why |
|---|---|---|
| You have a finished drywall theater room. | HT Design self-contained panels | Less invasive and avoids individual fiber routing. |
| You are building a theater from scratch with open ceiling access. | Traditional fiber optic kit or HT Design panels | A kit gives custom star placement; panels save labor and create a finished acoustic surface. |
| You want the fastest practical installation. | HT Design self-contained panels | The star field is already built into the panel. |
| You want a completely random custom star map. | Traditional fiber optic kit | You control every fiber location. |
| You want acoustic ceiling treatment plus stars. | HT Design self-contained panels | The panels combine acoustic fiberglass construction with the star effect. |
| You do not want loose fibers, glue, trimming, or illuminator access problems. | HT Design self-contained panels | Cleaner installation with fewer labor steps. |
A traditional DIY fiber optic kit is best for a custom builder who wants full control over every star point and has the ceiling open. It is not the easy route.
HT Design self-contained star ceiling panels are the better choice for most home theater buyers because they provide the fiber optic star effect inside a finished acoustic panel. You avoid the worst parts of a traditional DIY kit: drilling hundreds of holes, feeding loose fibers, gluing, trimming, routing, and figuring out where to hide the light source.
Yes, but the difficulty depends on the system. Traditional fiber optic kits require drilling, routing, trimming, and finishing individual fibers. HT Design self-contained panels simplify the job because the star field is built into the panel.
Yes. For most finished home theater rooms, self-contained panels are easier because you are installing finished panels instead of building the star ceiling point by point.
Not with HT Design self-contained panels. Traditional fiber optic kits usually require drilling individual holes for the star points.
Yes, but follow the installation instructions carefully. EZ anchors are for 5/8" drywall with wood framing only. Other ceiling conditions require alternate attachment methods.
Smaller panels are easier to handle, but larger 48" x 96" panels should be installed with at least three people because of size and handling requirements.
They are acoustic fiberglass panels and can contribute to room acoustic treatment, but they should not be described as a complete soundproofing system.
The biggest advantage is labor reduction. You avoid individual fiber routing, drilling hundreds of holes, gluing, trimming, and remote illuminator planning.
Call HTmarket.com at 1-888-764-9273 for help choosing between HT Design self-contained star ceiling panels, traditional fiber optic kits, and custom star ceiling layouts.
Product availability, URLs, sizes, power requirements, installation requirements, prices, and specifications may change over time. Confirm current product details and local code requirements before ordering or installing.