1
Remove Existing Hardware
When installing the panel on an existing door, remove the existing door knob and latch set before beginning.


Follow these instructions carefully to mount the panel, install the hardware and secure the finished assembly to the door.
When installing the panel on an existing door, remove the existing door knob and latch set before beginning.
If an optional door edge cap was purchased, install it before the door panels because the panels cover the edge cap.
Paint the visible areas in a color that coordinates with the panel, preferably one to two weeks or more before mounting.
Center the supplied template 5/8 inch from the top of the door and hold it in place with tape.
Drill eighteen 3/32-inch holes where indicated on the template for the six mounting brackets.
Carefully remove the template and screw the six supplied mounting brackets to the door with the supplied screws.
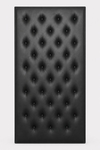
Position the panel over the mounting brackets and pull down on the top edge, seating the panel securely against the door.
Remove the preinstalled plate and attach the handle to the plate with the supplied bolts.
Confirm that the panel is in its final position before proceeding.
Attach the panel to the door with at least three countersunk 2 1/2-inch wood screws in the area under the pull plate.
Hollow-core doors usually contain solid wood for only approximately 2 inches near the edge. These screws must enter the solid area.
Replace the pull plate with the handle attached.
Approximately 5/8 inch of the door remains visible along the sides and top. Approximately 1 1/2 to 2 inches remains visible at the bottom.
Verify the template position, panel orientation and hardware configuration before drilling or making the final attachment.
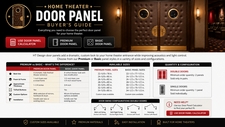
Use the sizing calculator to confirm the panel size, quantity and door orientation before ordering.
Use the Door Panel Calculator View the Premium Door PanelInstallation instructions for the HT Design Premium Home Theater Door Panel.